Setting Up QuantLynk
Connect your QuantLynk account to your broker and wire it into your TradingView strategy. By the end, your strategy will know which account to trade and how to reach it.
You will need:
- An active Vibe Algos subscription with TradingView already set up — complete Phase 1: TradingView first if you haven't.
- A Tradovate account (see below if you don't have one yet).
- About 30–45 minutes for the first-time setup.
You have two options:
- Open a personal Tradovate account at tradovate.com — you can start with a demo to test, then fund a small live account when you're ready.
- Use a futures prop firm that runs on Tradovate — you trade their capital instead of your own. Three popular options:
- BluSky Trading — blusky.pro
- Lucid Trading — lucidtrading.com
- My Funded Futures (MFFU) — myfundedfutures.com
Each prop firm has its own rules, evaluation process, and cost. Compare before signing up.
Sign up for QuantLynk
Go to quantlynk.io and create an account.
QuantLynk's full help documentation is available at login.quantvue.io/quantlynk/help if you want to dig deeper at any point.
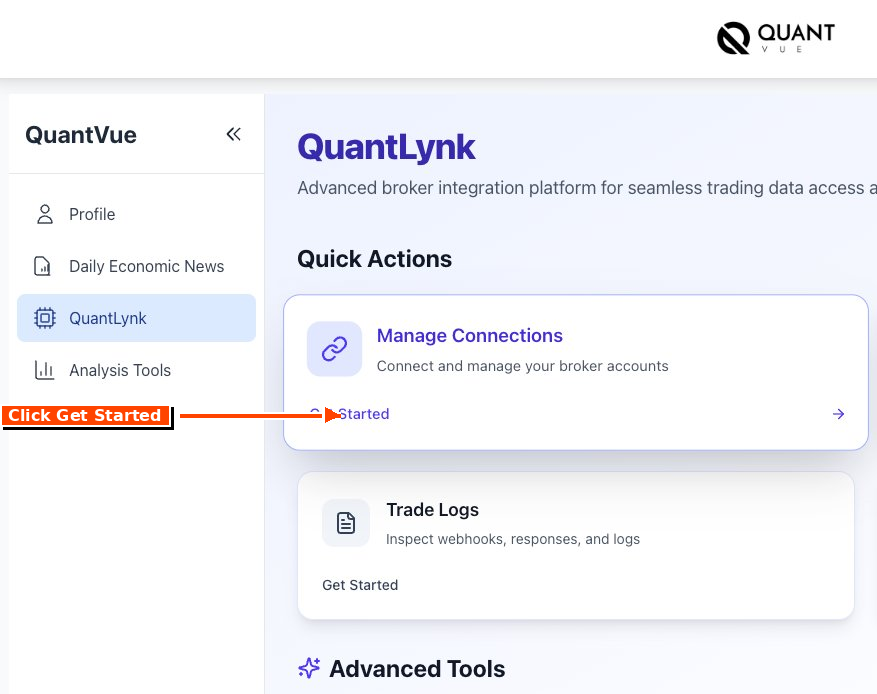
Connect your Tradovate account
From the QuantLynk dashboard, click Get Started under Manage Connections. Enter your Tradovate login credentials (or your prop firm's Tradovate credentials) when prompted.
Create a Trading Group
Navigate to the Trading Groups page and click + Create Group. Name the group after the strategy you're running (for example: The Chariot). Naming the group after the strategy keeps things organized as you add more strategies later.

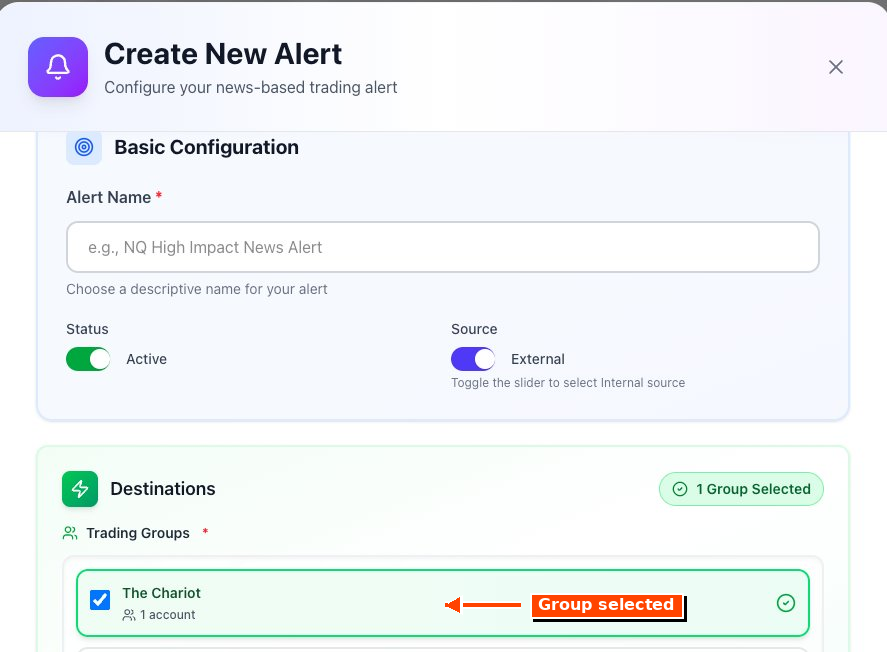
Create the Trading Alert
Inside your new group, create an alert. The Create New Alert dialog has three sections you need to fill in:

- Alert Name — name the alert after the strategy (e.g. The Chariot).
- Trading Groups (Destinations) — check the box next to the group you just created. You'll see a "Group Selected" badge confirm the selection.
- Symbol Mappings — click + Add Symbol and enter the current MNQ contract (more on this below).
Click Create Alert when all three sections are filled in.
MNQ1! is the continuous rolling chart used in TradingView for charting purposes only. Brokers don't trade it — they trade specific quarterly contracts. So in the Symbol Mappings, type mnq and select the current contract from the broker's list.
MNQ contract codes:
| Quarter | Code | Example for 2026 |
|---|---|---|
| March | H | MNQH26 |
| June | M | MNQM26 |
| September | U | MNQU26 |
| December | Z | MNQZ26 |
Approximate 2026 rollover dates (when volume shifts from the expiring contract to the next one):
- MNQH26 → MNQM26: around March 12, 2026
- MNQM26 → MNQU26: around June 11, 2026
- MNQU26 → MNQZ26: around September 10, 2026
- MNQZ26 → MNQH27: around December 10, 2026
Quarterly contracts officially expire on the third Friday of the contract month. Volume typically migrates to the new contract about 8 days before that — known as "rollover Thursday." When in doubt, search "current MNQ contract" or check TradingView's contract list.
You'll need to update this mapping every quarter to keep trading on the active contract. Set a reminder.
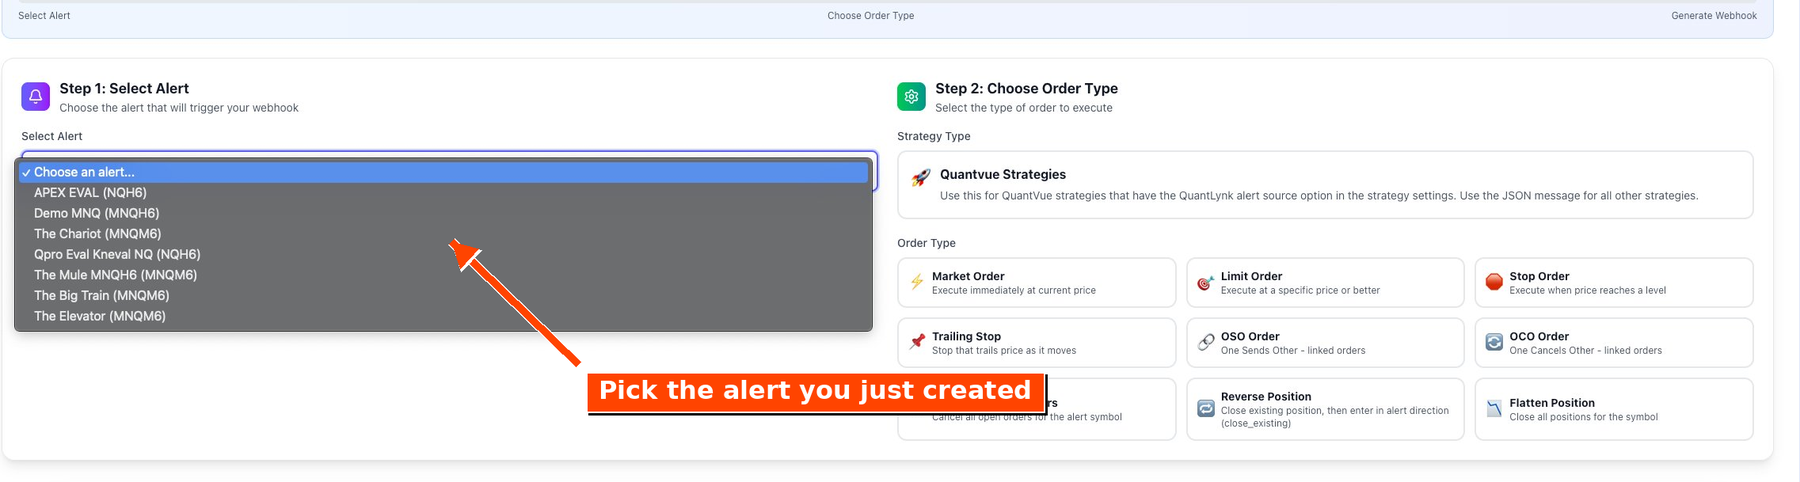
Open the Webhook Generator
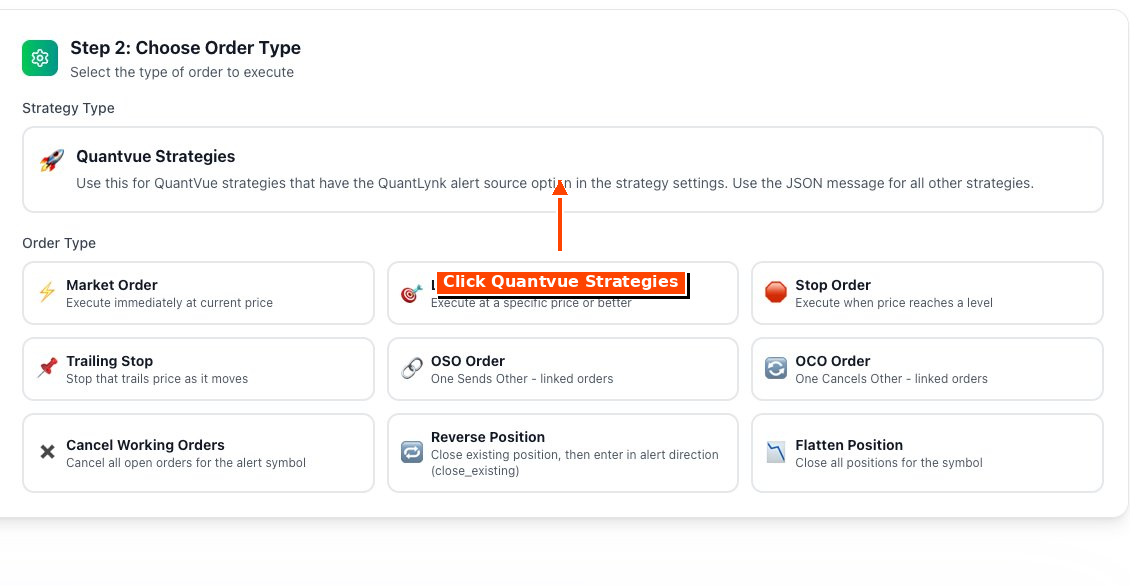
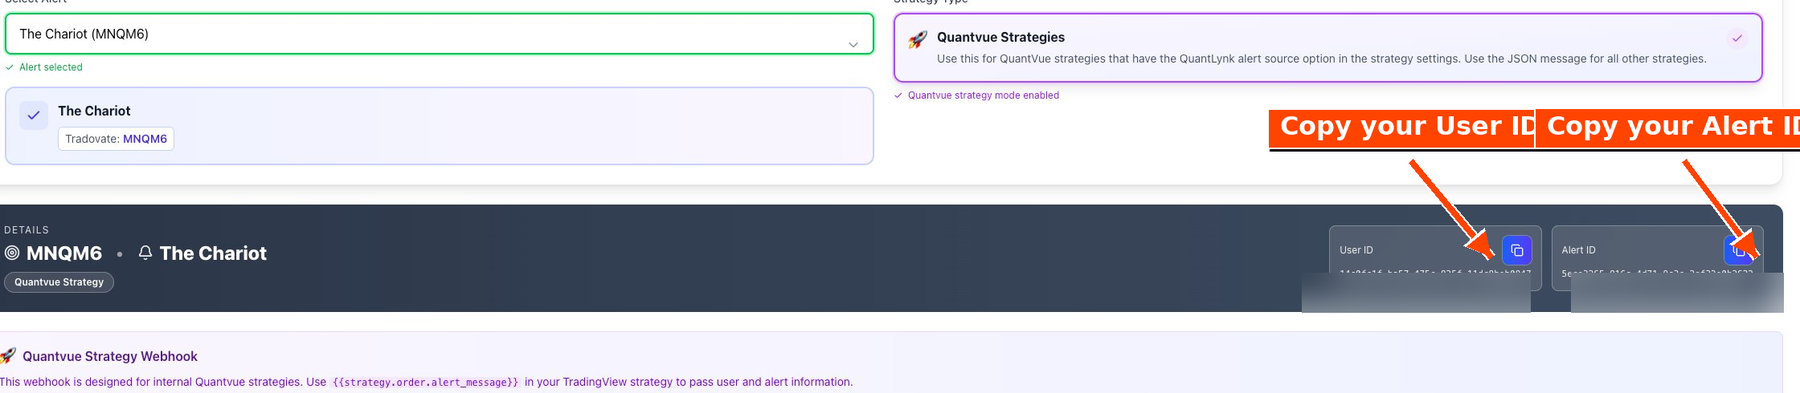
Click Webhook Generator at the top of the alerts page. In Step 1, choose the alert you just created from the dropdown.
In Step 2, click Quantvue Strategies. All Vibe Algos strategies are built to use this option — they will not function correctly with the JSON message option.
Copy your User ID and Alert ID
Once Quantvue Strategies is selected, you'll see a Details section with your User ID and Alert ID. You'll paste these into TradingView in the next step. Use the copy buttons next to each ID — both are unique to your account, so don't share them.
Paste the IDs into TradingView's strategy settings
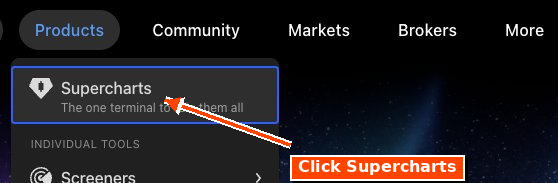
Open TradingView in a new browser tab. Hover over the Products menu and click Supercharts.
Your chart should still have the strategy loaded from the TradingView Setup Guide. Hover over the strategy name in the top-left of the chart and click the Settings (gear) icon to open the Inputs panel.
In the Inputs panel:
- Confirm the Risk Disclosure at the top is checked (you should have done this during TradingView setup).
- Scroll to the bottom of the Inputs panel. You'll see fields for:
- Quantlynk User ID — paste your User ID here
- Quantlynk Alert ID — paste your Alert ID here
- Use Quantlynk Webhooks — make sure this is checked (it's checked by default)
- Click OK to save.
Need help?
Email welcome@vibealgos.com. The QuantLynk help docs at login.quantvue.io/quantlynk/help cover platform-specific issues in more depth.